This post contains affiliate links
We've reached the end of the kitchen tutorials now, and I think I've saved one of the best till last. I say best, because this project genuinely surprised me with how easy and effective it was!
I had debated for a long time over what I was going to do with the counters. What I originally wanted was solid wood butcher block, like we have on the island, and we probably could have afforded it at the time if we installed it ourselves, but the problem was that I hadn't settled on what my idea of the ideal kitchen was. We knew that we would be changing things down the line when we had the money, so it seemed foolish to rip out the old counters to install the ones we wanted now, when we would probably have to rip it all out again next year when we were doing the full renovation.
** update!!! If you'd like to see how my counters are holding up 18 months later you can find that post here
I've finally learned that it's better to live with a space for a while before making any big decisions, you may think you know what you want, but once you've lived in a new space for a few months you'll have a much better feel for how it works and what you really want to do with it....this realisation took a while to come to, I must admit!
So, I was left with ugly counters that weren't going anywhere anytime soon, and a burning desire to have a whole new kitchen! Painting it or covering it in cement were two ideas that kept popping up when I tried to find some inspiration on pinterest, but they just sounded like things that would be way too tricky to get right for me. And that's where this stuff came in.....
Americans know it as contact paper, we know it as sticky back plastic, it's cheap, it's durable, it's readily available, what's not to love?!
I had used it to makeover a table top after I had seen Kimberley over at Swoonworthy use it for the same thing and just found myself thinking "why doesn't anyone use this for kitchen counters?". So I checked pinterest, and it turns out they do! Just not very often ;)
I told my husband what I planned to do and he said "we'll just have to make sure we don't put hot pots down on it", to which I replied, "who the frick puts hot pots down directly on countertops?!". I'm right, right? Who does that?! But just to err on the side of caution, I'm telling you guys not to put hot pots directly on top of this stuff, it's plastic!
So I picked up a sample of a colour I liked (there are several different colours of "marble" available) and worked out how much of it I would need.
I then spent several fruitless weeks checking the shop that sold it to see if their stock had been replenished as they didn't have enough....it never was. So annoying! Ordering online was not an option as the delivery charges were more than the cost of the paper, so I waited, and checked, and waited....and checked....
....and finally gave in and did my usual, buying something completely different that they had in stock rather than wait any longer! Happily, I actually liked it much more than my original choice once I saw it in the kitchen. In the shop I thought it was much too strong a pattern with the black going through it, but when it was actually in the room it was soooooo much better! I think the kitchen had so much white and grey already that the first one was actually really "blah", wheras the one I went with is a lot more dramatic and doesn't just blend into the rest of the kitchen.
So the next quiet evening I had I cleared off all the counters, scrubbed them down and made sure they were dry, and then set to work applying the contact paper.
Now, at this stage I still fully expected that it wouldn't work, and I had saved the receipt so that I would be able to return the rolls I didn't use! (I bought 6 at €4.99 each, and 2 meters per roll).
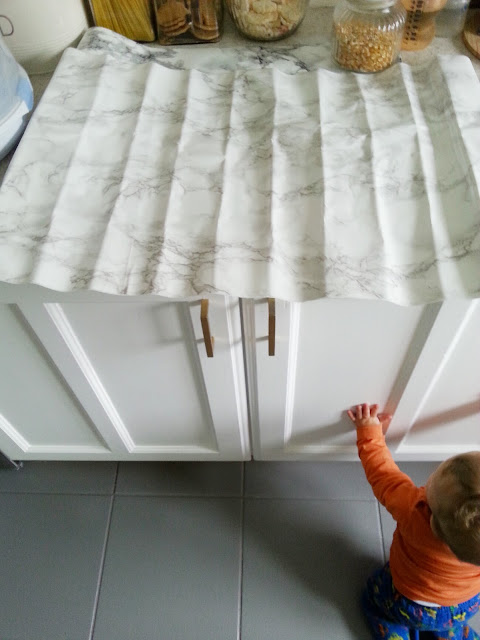
I thought that even if it went on properly, the pattern repeat wouldn't match up, and the joins between the sections would be really obvious. So I roughly measured out a couple of pieces and cut them, then I removed the backing from the first one, and using a card from my wallet to scrape across the top as it was stuck down to get rid of any air bubbles. I left a small edge at the sides in order to be able to trim it off really neatly once it was stuck down.
As I did this I had to lift it up again several times to get rid of some bigger bubbles and make sure it was lined up properly (I got better after the first one!) and this didn't make any difference to it. It didn't stretch, or pull out of shape, or scratch. In fact, I peeled it off and re-stuck it several times, and it looks exactly as good as some of the later ones which didn't have to be lifted off at all once they were first applied. This is hardy stuff!
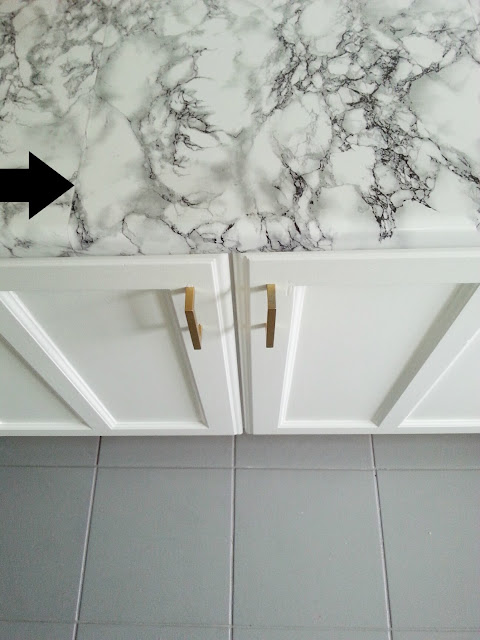
When it came to applying the second piece, I did try to match up the pattern somewhat, but if I was to do it exactly I would have had to buy double the amount and waste half of it, and that was not happening! So I crossed my fingers and just went for it.......and it was fine! I mean, yes, you can see the join when you look, but if you weren't looking, or even if you were and just happened to be standing more than a foot away from it, it was impossible to tell!
I can't tell you how happy this little realisation made me :) Just to show you what the joins are like, if you look at the picture below, the tip of the arrow is just touching where the two pieces overlap.
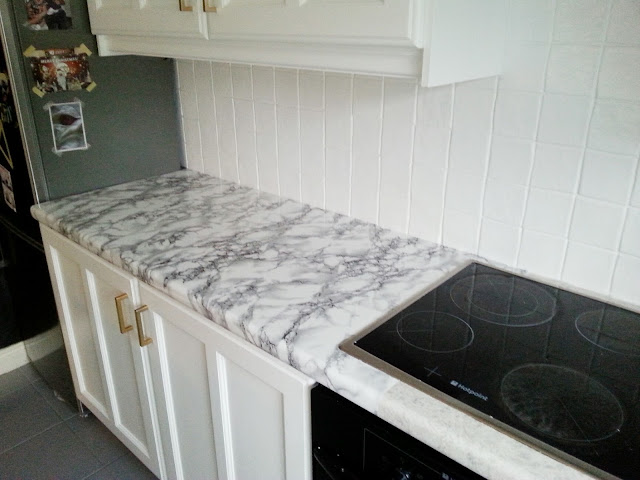
So I continued on laying the pieces, overlapping them the tiniest bit to try and get it as seamless as possible (and prevent crumb catchment areas forming!), and cutting carefully around the cooker and sink with a very sharp craft knife after using the card to smooth the paper up as close to these obstacles as possible. I also used the craft knife to trim off the excess from the front edge of the counters. I had wanted to fold it under in order to get everything as seamless as possible, but for some reason it wouldn't stick properly to the underneath even though it did so well on the top. I'm not sure if this is because of the material the counters are made of underneath or if it was just because the lip I was leaving was too small, and therefore didn't have enough scope to stick properly....my gut tells me it was the latter problem. But no worries, it looks just as well trimmed off actually. Sharp craft knives are wonderful tools, they carve off this stuff like it was made of butter!
So two hours of very satisfying, easy project later I had new counters! It all went surprisingly well, which makes me wonder why no-one else seems to be doing this!
There are one or two spots where I got these little bumps, and that's because I missed tiny little flecks of paint that ended up on the counters after I painted the walls. I did clean it down and thought I had gotten everything, but this just shows that tiny little lumps will show up much bigger than you'd think! They aren't really noticeable, and if they really bothered me I could just pull up that section, sand them off and replace it, but that work to payoff ratio just doesn't seem sensible to me! If I was doing this again I would give the whole thing a fairly vigorous sanding before I laid the contact paper though, and I'd be sure to give the whole thing a really thorough clean afterwards to make sure that it had a clean, dry surface to adhere to.
I ended up using far less of the paper than I thought I'd need (3 rolls rather than 6) and I kept one just in case I do ever need to replace a section. But honestly, this has been in place for two months now, it's been scrubbed, had water sitting on it, things dropped on it and naked toddler bums sitting on it (I really have to break her of that habit) and it hasn't lifted or torn anywhere. I'm hoping to get maybe a year out of it to tide us over until we can do a bigger kitchen makeover, but honestly I can see it looking the exact same the day I remove it. And by the way, considering how durable it seems to be, removing it is really easy, so this would be a perfect solution for those who are renting.
So that's my lovely new, cheap as chips kitchen. I am totally in love with it, and the €180 and weeks work was TOTALLY worth it! Have you ever used contact paper to update something? Talk to me!!!
I'll be back next week with something completely different, I feel a little Halloween craft coming on ;)
If you would like to read about the other projects in my kitchen makeover:


