So you know how I've been saying since the dawn of time that the en-suite is practically finished and I just have to add the finishing touches and it'll be done?
Well.....somehow last week I went in there to put up a frame and ended up stencilling the floor.
That's how it works around here, I'll put things off for months and then find myself elbow deep in paint at one in the morning, or ripping out manky carpet after just going upstairs to put some washing away. I've learned to just go with it. Gavin has learned to not ask questions.
If you've been with me for a while you'll know that I painted my kitchen floor to make it less vomit-inducing while we saved up to have it ripped out and replaced. Well, the floor in here was less offensive, but just as dated. I had thought I would just leave it as is, hoping that it would kind of just fade into the background, but then as the rest of the decor in here came together I thought it would be a shame to have the floor sitting there, all beige and boring, ruining the look.
 |
So yeah, one day I came up here to put up a few pictures, realised I had a tin of paint, a stencil and two hours of actual free time until I had to pick Max up from playschool. It was a perfect DIY storm, and before I knew what was happening I had a coat of white paint on the floor.
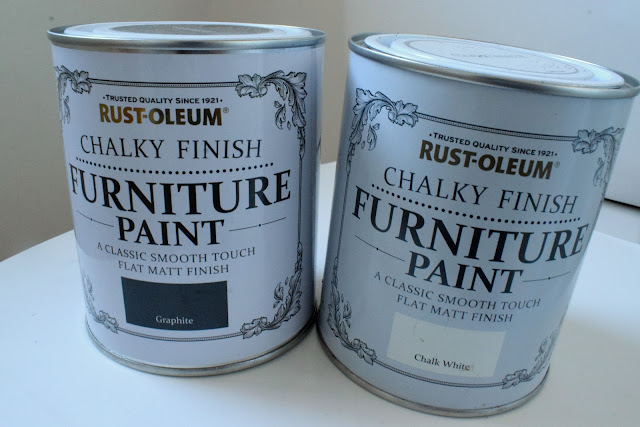
When I painted the kitchen floor I used primer and actual tile paint, doing two coats of each, and while it did do the job I definitely had to maintain it, touching it up every six weeks or so as little chips appeared in it. Plus the paint was stinky and expensive, so this time I decided to try a different method that I had seen on a lot of American blogs, namely, chalk paint covered by a protective finish, in my case matte water based varnish.
 |
| similar grey paint - similar white paint |
I thoroughly cleaned the floor and let it dry first, then I cut in around the edges and along the grout lines with a brush before going over the whole floor with a small roller. And here's my first tip, chalk paint dries ridiculously fast, so if I were to do this again I would work in small sections rather than doing the whole floor at once, as I found I had to be very careful not to lift the paint from the areas I had cut in with the wet paint on the roller.
I did three coats of white to make sure everything was completely covered, and once that was dry I was ready to start stenciling!
Now, if you've been with me for any length of time you'll know that I don't have the patience for precision unless it's very easy to achieve, so I was more than half convinced that I was going to totally balls this whole thing up. I figured the best way would be to start in the middle and work out, so I eyeballed the centre, stuck it down with frog tape in the corners and got to work.
That's right, no measuring of any kind. It's either pure blind luck that I didn't end up with a total mess or this particular pattern is very forgiving.
 |
| Similar stencil |
I loaded my roller with the darker paint and then rolled it on some newspaper to get rid of the excess in the hopes of minimising any bleeding underneath the stencil, then firmly rolled it over the stencil until all the shapes were completely filled in. Where the pattern went over a grout line I had to dab at it with a brush to fill it in.
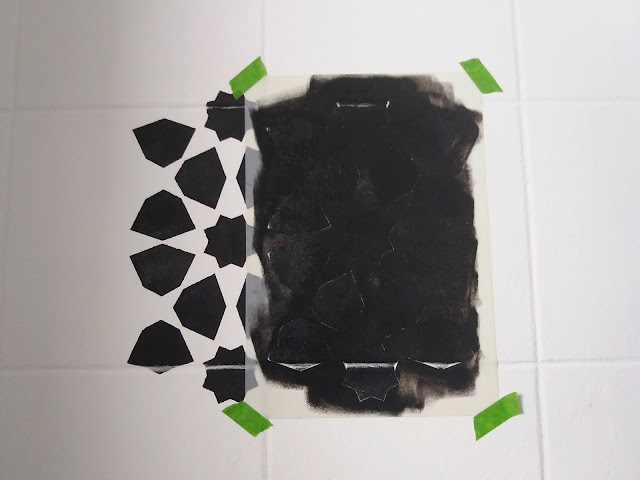
As soon as I was done I lifted the stencil, moved it over until the pattern overlapped perfectly at the side, then stuck it down again and repeated the process. So what I mean is that after the very first one I did there was always a part of the pattern that was already filled in, because I was laying the stencil partially over my previous work. This is what gives you the continuous pattern and helps make sure everything is lined up properly. The paint dried so quickly that I never had a problem with smearing while I was doing this but I did occasionally wipe off the stencil to remove any excess paint that might have seeped under.
I realise that this "overlapping" is the crucial point of this project and probably what I should have taken a million photos of....I don't know what to tell you. I had a couple of hours of kid free time to listen to podcasts, drink coffee and paint and I guess the excitement got to me. So this is all I have......
I'm sorry, I hope my shoddy description of the process is enough!
The main parts of the floor went quickly and were relatively painless, but when it got time to get right up to the edges things got a bit trickier. All I did was bend the stencil to get the pattern as close to the edges as I could and roll the paint as normal. I ended up with a small gap the whole way around but it just looks like a grout line.

Once the whole floor was done I went back over it with an artists brush and the white paint and cleaned up the few places where paint had seeped under the stencil like below....

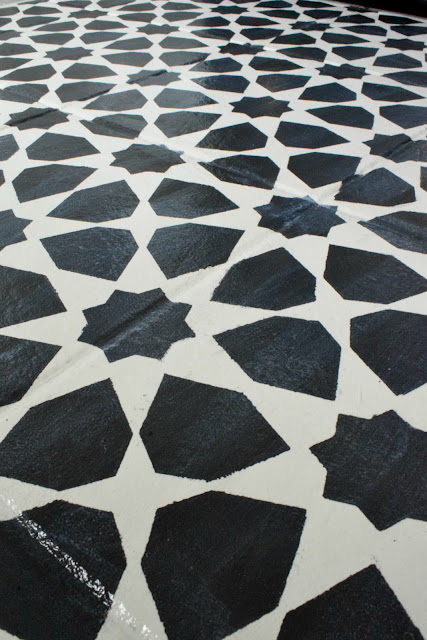
Once everything was dry I went over it with three coats of water based matte varnish to protect it. I should point out that the whole time I was working on this I made sure to walk on it as little as possible and when I did need to I wore socks. Chalk paint is incredibly soft and easy to scratch. Like seriously. I managed to scratch the white layer with my bare feet!
 |
 |
| Similar varnish |
The varnish goes on milky but dries clear, and while it does give a very slight sheen this was the matte version so it's not too shiny. Using water based varnish meant it was a much quicker process as each coat dried in an hour. Also it wasn't so stinky that it gave me a headache and it shouldn't yellow over time like oil based products do.
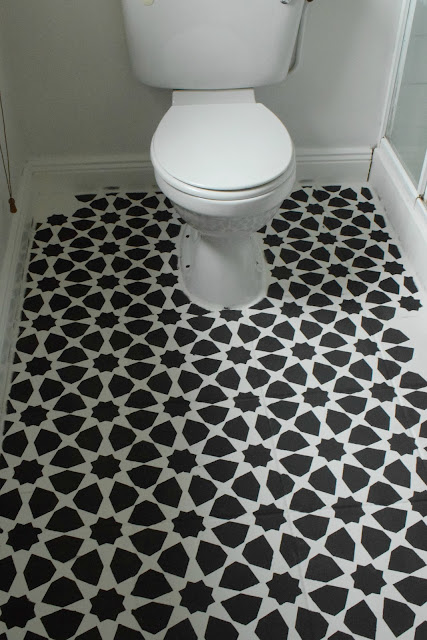
And so it was done!
I have high hopes for this lasting a long time without much upkeep. It already feels sturdier than the kitchen floor ever did, despite the fact that I used specialised products there and in here I'm winging it with products that definitely weren't meant to be used like this. Also it's extremely rare that anyone wears shoes up here, and it's only really cleaned every couple of weeks compared to the daily wear the kitchen got from brushes and mops.
I was honestly surprised at how relatively easy this was, and I'm absolutely delighted with the result. It's a total game changer, and now that I've seen it I can't imagine the space without it!
What do you think? Have you ever stenciled anything? Will you be giving it a try now? I've put affiliate links to some of the products I used or similar below, and I'd love to see pictures if you end up trying it!
If you liked this post, you might want to check out:


